Electronics
Adafruit FeatherM0 ASF Tutorials
The source code for the tutorials can be found on GitHub.
08_SSD1306_128x64_OLED
The goal of this project is to drive a SSD1306 based 128x64 OLED display, using the Adafruit FeatherM0.
For readers of the 07 SSD1306 FeatherWing_OLED tutorial a lot of things will look familiar.
The difference is, that this tutorial will not hide the SSD1306 driver details, but will use this driver directly, to show a more vendor independent solution.
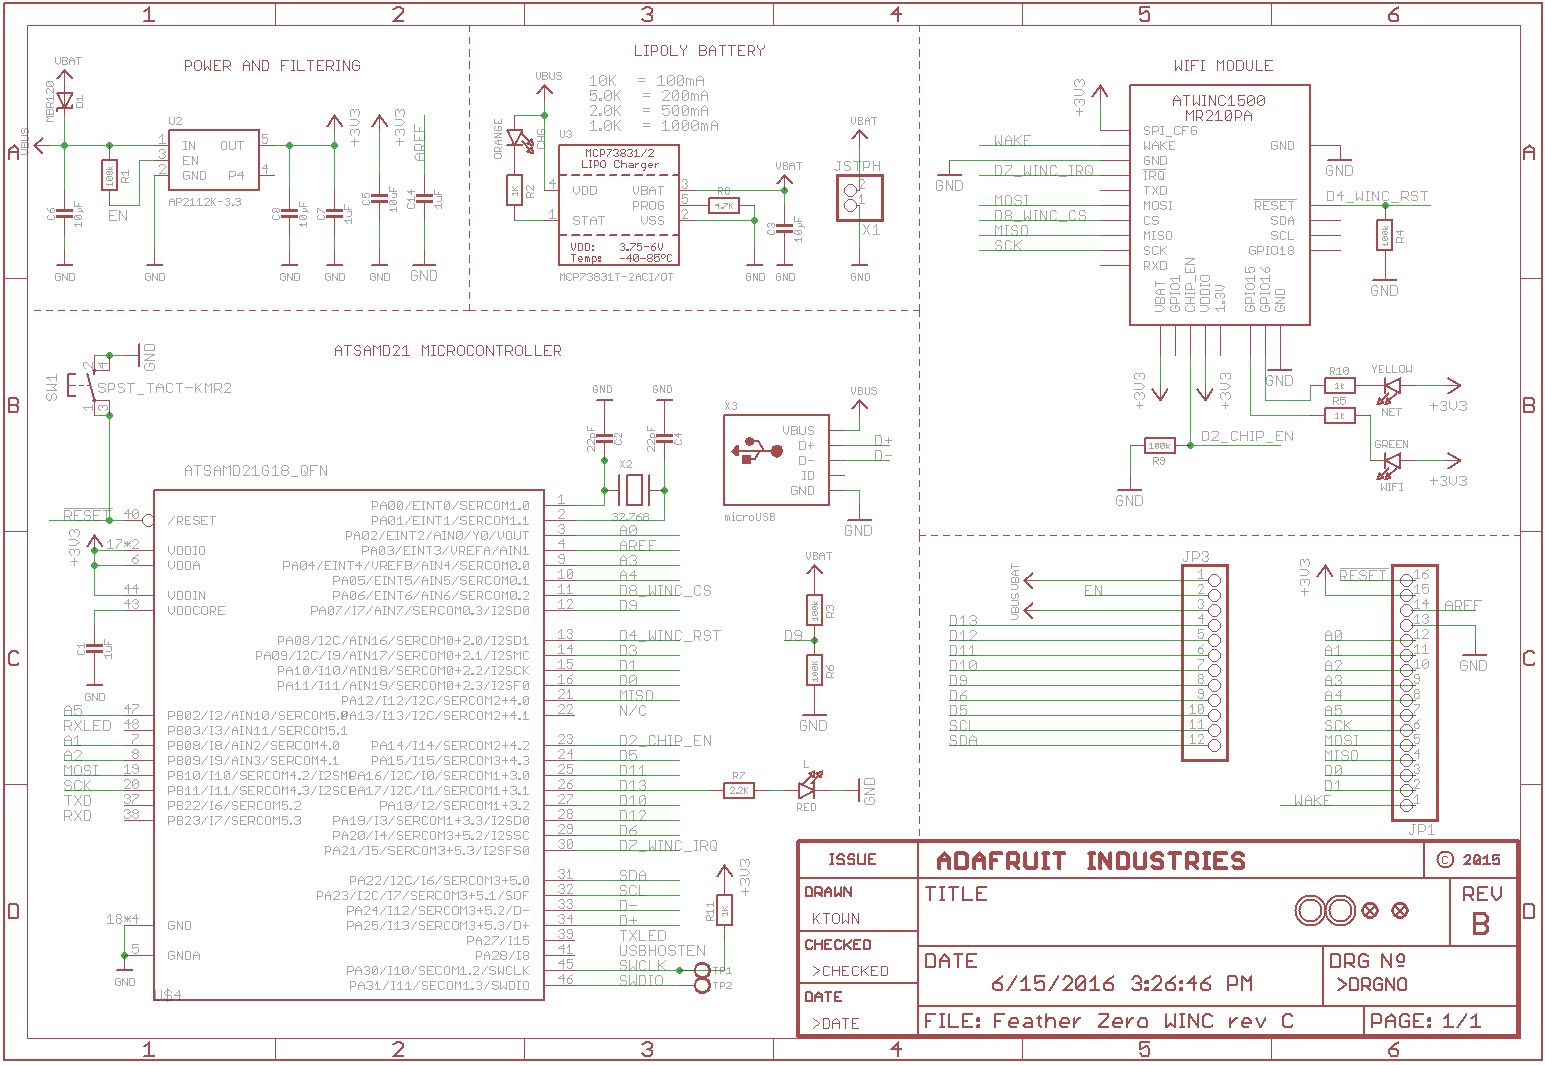
Schematic Source: Adafruit,
License: Attribution-ShareAlike Creative Commons
FeatherM0 - OLED connections
The connection between the MCU and the SSD1306 display driver IC are shown in the following table:
| JP2/3 | ATSAMD21G18 | SSD1306 | |
|---|---|---|---|
| Pos. 11 | PA23 | I2C SCL | SERCOM3+5.1, I2C serial clock |
| Pos. 12 | PA22 | I2C SDA | SERCOM3+5.0, I2C serial data |
While the SSD1306 datasheet shows that the chip supports a couple of other interfaces beside I2C, including SPI, only the I2C interface is connected on the OLED module.
This unfortunately means, that we can not use the SSD1306 OLED component found in the Atmel Software Foundation (ASF), because this one seems to be hard-wired to SPI. So we have to write our own driver for the SS1306 based OLED displays.
Software
The program will:
- Configure the SERCOM0 module as USART for sending messages to a terminal
- Print a welcome message to the terminal
- Configure SERCOM3 as I2C master to communicate with the SSD1306 on the FeatherWing OLED
- Initialize the OLED using the DIT SSD1306 OLED driver library
- Draw some initial screen content to the OLED
RESET (SW1) |
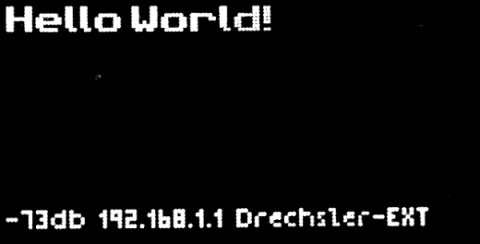
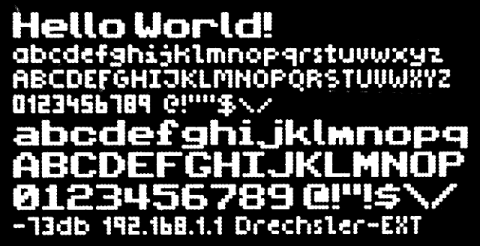
displays the initial welcome screen, depending on the parameter for the on_reset() function:
|
FONT_08PX
|
|
FONT_06PX
|
Adding a new Atmel Software Framework (ASF) Skeleton Project
Add a new ASF Skeleton Project for the 08_I2C_SSD1306_64_lines_OLED tutorial to the existing solution.
See my Step-By-Step tutorial if you are not sure how to do this.
Choosing a startup project
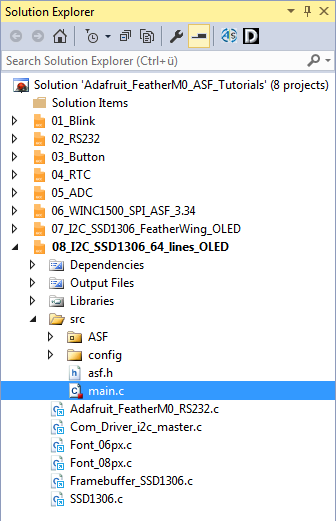
To make sure AtmelStudio always compiles and runs the 08_I2C_SSD1306_64_lines_OLED project we make it the StartUp Project.
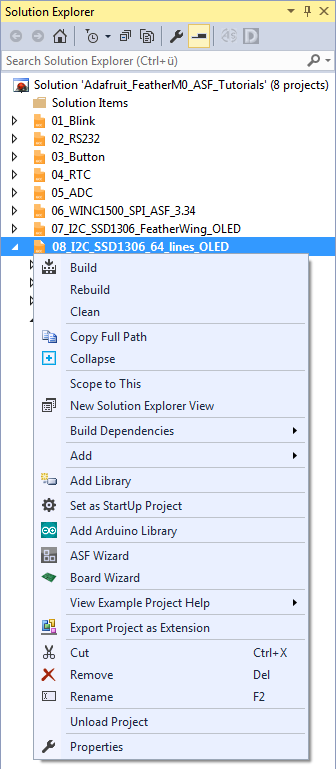
- In AtmelStudio in the
Solution Explorerwindow right-click on08_I2C_SSD1306_64_lines_OLED - In the context menu choose
Set as StartUp Project
Adding the project specific Atmel Software Framework (ASF) code
The next step is to import the ASF modules needed for the specific project.
- Open the ASF wizard under
Project|ASF Wizard - Select Project
08_I2C_SSD1306_64_lines_OLED
or use the ASF Wizard entry in 07_I2C_SSD1306_FeatherWing_OLED's context menu.
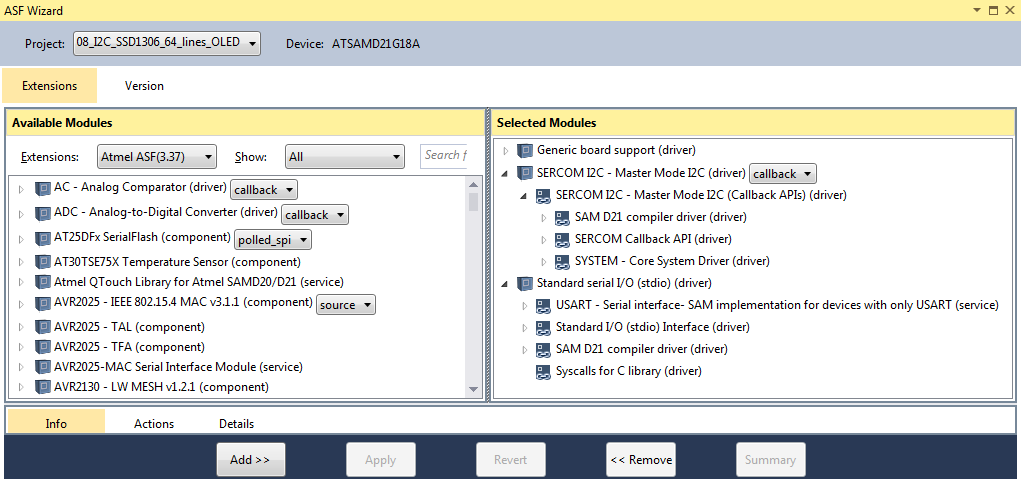
You should see two lists:
Available ModulesSelected Modules
In Selected Modules we already see:
Generic board support (driver)SYSTEM - Core System Driver (driver)
This is the standard framework needed for any ASF application.
In Available Modules find:
SERCOM I2C - Master Mode I2C (driver) (callback)
Add>> the module to the project.
This is the driver for the SAM SERCOM I2C module in Master Mode. It provides a unified interface for the configuration and management of the SERCOM module in I2C mode.
This is our communication interface to the SSD1306 on the FeatherWing OLED.
Also in Available Modules find:
Standard serial I/O (stdio) (driver)
Add>> this module to the project.
This is the common standard serial I/O management driver that implements a stdio serial interface on SAM devices.
While this driver is strictly speaking not necessary for the project, it provides the printf() function for printing to the serial terminal, making printing messages more convenient.
This driver also includes the
- USART (service), that includes the SERCOM USART driver
Now press Apply. This will add all the necessary ASF code to our project.
Using the DIT Adafruit Feather Library
For this project we need to:
- Add the
Adafruit_FeatherM0_RS232.hfile path to the include search path of you project - Link the
Adafruit_FeatherM0_RS232.cfile to the project
Also we need to add the path to the following *.h files to the project search path and links to the following *.c files to the project:
Com_Driver (.h) |
Generic Communication Driver interface |
Com_Driver_i2c_master (.h,.c) |
I2C bus master communication driver |
Font (.h) |
Provides global declarations for the font system |
Font_06px (.h,.c) |
Tiny 6px proportional bitmap font |
Font_08px (.h,.c) |
Readable 8px proportional bitmap font |
Framebuffer (.h) |
Generic framebuffer interface |
Framebuffer_SSD1306 (.h,.c) |
A 1bit per pixel framebuffer implementation for the SSD1306 display controller IC |
SSD1306 (.h,.c) |
SSD1306 display controller driver |
See my Step-By-Step tutorial if you are unsure how to do this.
Writing the application code
In the Solution Explorer find the generated main.c.
As usual, after some file level comments, we start by referencing the include files used.
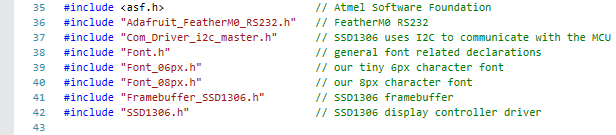
All we need to import to get the whole ASF magic working is the asf.h, that was generated by the ASF wizard. The entry should already be there. The wizard took care of that for us (line 35).
The rest of the lines 36..42 include the files as described in the previous section.

- In line 44 I have defined a symbolic name for the end of line characters of a string.
- Lines 45..48 define the welcome message, the program should print to the terminal at startup.
The compiler replaces__DATE__and__TIME__with the current date and time at compilation time.
Quite convenient, if you have to figure out what version of your software your board is actually running.
main()
To better understand how the application works, we will start the explanation of the code with the main() function in lines 179..244.
However, there are a couple of things on top of main(), that are worth noting and that we will come back to in detail later:
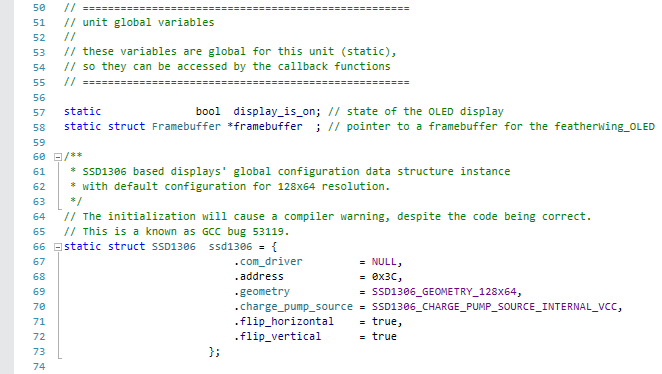
- Lines 57..73 declare some unit globale variables
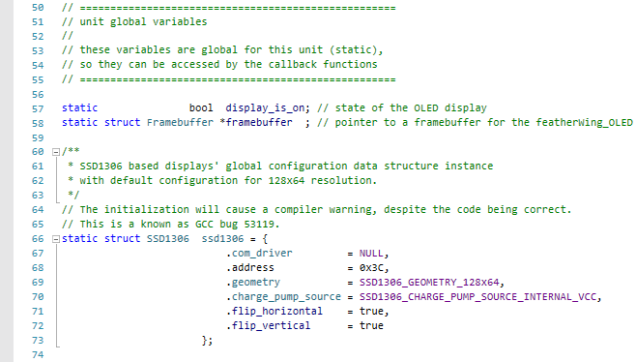
These variables need to be global, so they can be access from within callback functions.- In
display_is_onwe store the current state of the OLED display (line 57) framebufferis a reference to the generic interface of a Framebuffer instance, used to locally double buffer the (future) OLED screen content (line 58)- In line 66 we crate an instance of the SSD1306 driver configuration data structure and initialize it with the configuration values for a 128x64 display.
- In
- Lines 80..91 define some constants for drawing things on the OLED screen
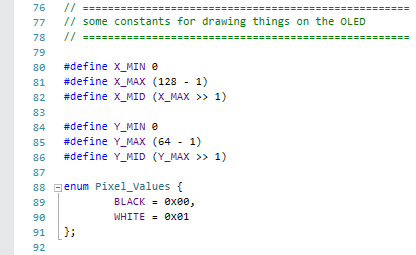
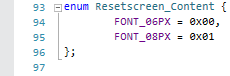
- Lines 93..96 define constants for selecting the screen content that is painted on
RESET
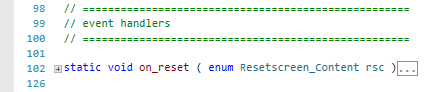
- The function in lines 102..125 implement what should happen, if the
Resetbuttons on the FeatherM0 is pressed
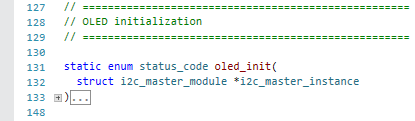
- The function in lines 131..147 initializes the FeatherWing_OLED subsystem
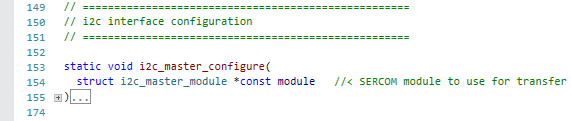
- The function in lines 153..173 configures the I2c master module used
The main() function itself starts by defining a couple of variables:
usart_instamce |
an instance of a SERCOM UART module, that is used to write debug messages to a serial terminal (Line 181) |
i2c_master_instance |
an instance of an I2C master module, that is used to communicate with the SSD1306 OLED controller IC (Line 182) |
status |
a variable for the return values of different calls (Line 183) |

- Line 189 initializes the board
- Line 190 enables interrupts globally
If you forget to enable the interrupts, interrupt callback functions will not work. - Now we use the DIT Adafruit Feather Library functions to:
- Configure the FeatherM0 RS232 SERCOM
(
RS232_configure(), line 197) - Enable the FeatherM0 RS232 SERCOM
(
RS232_enable(), line 198)
- Configure the FeatherM0 RS232 SERCOM
(
- Line 200 prints the welcome message to the serial terminal
Up to now, the code is pretty much known from the previous tutorials.
Now we start setting up the I2C subsystem:
- Line 207 configures the I2C Master module instance using the
i2c_master_configure()functions, implemented in lines 155..173 - Line 208 enables the I2C subsystem with the MCU as the I2C master
After a successful initialization of the I2C subsystem we bring up the OLED:
- In line 215 we use the
oled_init()function, defined in lines 131..147, to setup the OLED. - Since for this project there is no point in continuing, if the initialization fails, the application prints an error message and stops processing, if that is the case (lines 216..220)
- Line 226 creates a framebuffer_SSD1306 instance.
Note on Framebuffers |
| If you are not yet familiar with the concept of framebuffers, please read the Framebuffer article on Wikipedia. |
And since we have a slow I2C connection between the MCU and the DRAM on the FeatherWing OLED, I actually use two framebuffers, in a setup known as
double buffering:
|
| This is more efficient than sending every pixel changed by one of the graphic functions directly to the OLED display. It also helps to decouple the graphic function implementations from the peculiars of the display hardware access. |
With the setup done, we can now start using the OLED in our application's logic.
The first step is to clear the screen of the OLED:
- Line 232 clears the framebuffer using it's
clear()function.
Remember! This only clears the MCU internal framebuffer. It does not yet change the OLED display. - For that to happen Line 233 transfers the new content of the framebuffer to the OLED display (in this case clearing it),
using the
ssd1306_display_update()function from the DIT SSD1306 driver library. - Line 235 switches the OLED display on, using the
ssd1306_display_on()function from the DIT SSD1306 driver library - Line 236 updates the status variable
display_is_onaccordingly
Next we use the on_reset() function, implemented in lines 102..125,
to draw an initial content to the framebuffer (line 238).
Line 239 transfers the this content from the internal framebuffer to the FeatherWing OLED display.
There is nothing left to do for the main application loop in lines 241..243.
i2c_master_configure()
This function configures SERCOM3 as an I2C master and the pins, the FeatherWing OLED SSD1306 is connected to as the I2C bus to use.
It doesn't seem to make much of a difference if you user SERCOM3 or SERCOM5, so I used the first on the list.
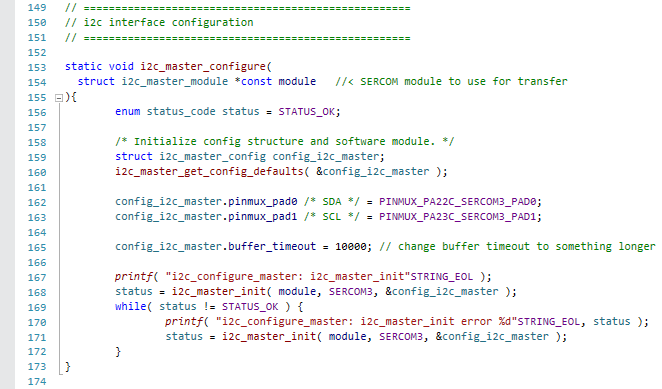
The function:
- First declares and initializes the variable
status, later used to store the return values of some functions calls (line 156) - Line 159 creates a data structure instance for
i2c_master_configdata - Line 160 initializes this instance with the default values
- Line 162 connects the SDA pad of SERCOM3 (pad 0) to pin
PA22Cof the MCU - Line 163 connects the SCL pad of SERCOM3 (pad 1) to pin
PA23Cof the MCU - Line 165 increases the timeout value for buffer write operations a little, so the FeatherWing has more time to react to transmissions requests from the MCU
- Line 167 prints a debug message to the terminal
- Line 168 tries to initialize SERCOM3 with the new values
- If the call to
i2c_master_init()is unsuccessful:- Line 170 prints an error message with the return value of the call to the terminal
- Line 171 retries the call
i2c_master_init(), lines 170 and 171 are embedded in awhileloop (Lines 169..172), that only terminates after the call was successful.
oled_init()
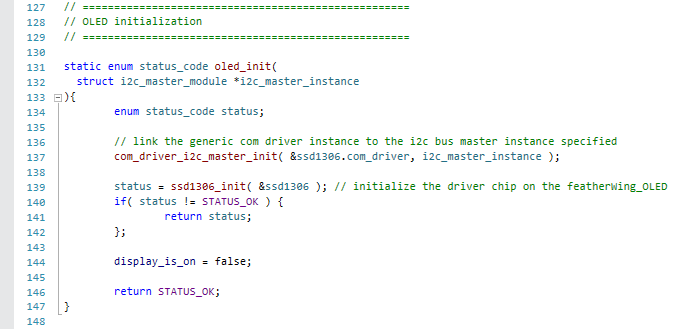
This function initializes the OLED display, by
- setting the
i2c_master_instanceas the com driver for the SSD1306 communication,
using thecom_driver_i2c_master_init()of the DIT Com_Driver_i2c_master library (line 137). - initializing the OLED based on the information in the
ssd1306configuration data structure,
using theSSD1306_init()function from the DIT SSD1306 driver library (line 139). - The initial state of the display is OFF, so we initialize the status variable accordingly (lines 144).
on_reset()
This function is called by main() in line 238, right after the initialization is done and before the control is handed over to the event handlers.

Since I'm not using a mono-spaced (all characters have the same width), but a proportional-spaced font (every character has an individual width), the ultimate width of a string on the screen not only depends on the number of characters in the string, but also on which characters appear how often in the string.
To be able to position any following string on the screen correctly, without going through some extra calculations, the *_draw_string() functions of the font libraries I use
(Font_06px,
Font_08px), return the accumulated width of the string drawn in every call.
Even so not used in this tutorial, we still need to pass a variable that receives this value to the functions calls.
This variable is defined in line 104.
Line 105 defines a variable for the x position to draw the test-strings to.
The way the code looks now, we could have used a constant, but if you want to experiment and write two or more strings in a line, you need a variable x position.
on_reset() is capable of drawing two different test screens, depending on the rsc parameter.
The valid values for this parameter are defined in the resetscreen_content enumeration in line 93..96.
FONT_08PX |
|
FONT_06PX |
|
The 6px height font was as small as I could get it. If you can get it smaller and still readable, mail me!