Electronics
Adafruit FeatherM0 ASF Tutorials
The source code for the tutorials can be found on GitHub.
01_Blink - Digital Output
As it is common practice, we start with the most simple application: Blinking a LED - The "Hello World" of embedded programming.
The schematic of Adafruit's FeatherM0_WiFi shows a LED on the ATSAMD21G18_QFN port PA17 (pin 26).
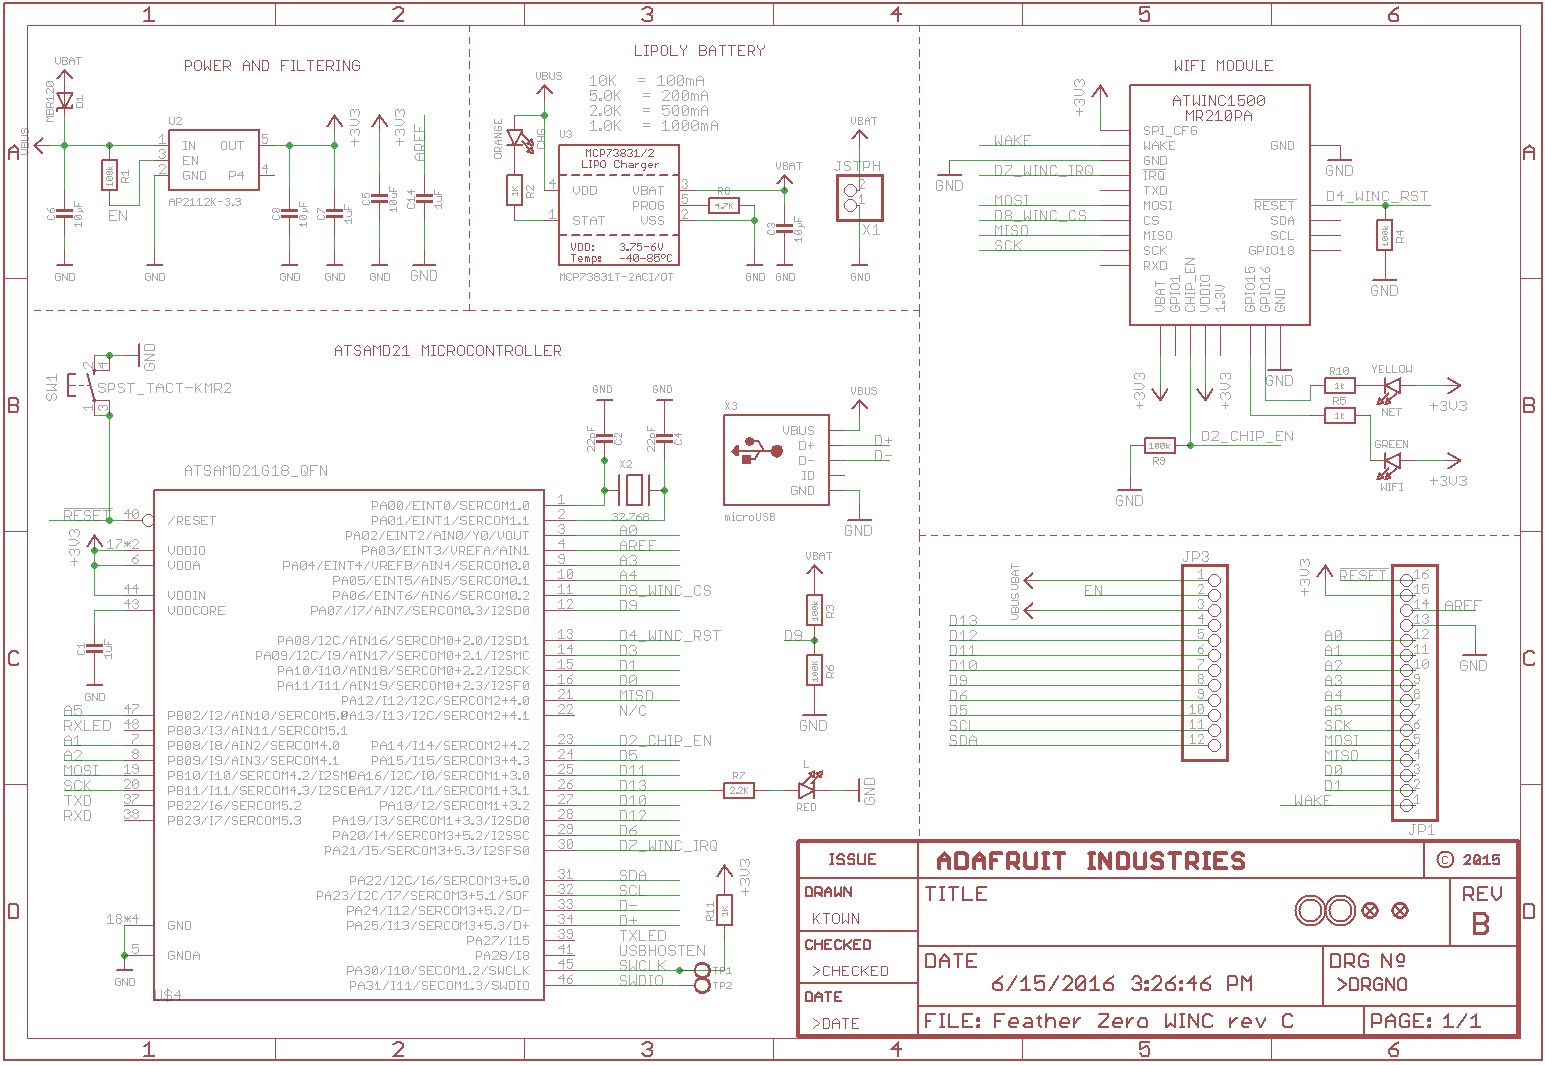 Schematic Source: Adafruit,
License: Attribution-ShareAlike Creative Commons
Schematic Source: Adafruit,
License: Attribution-ShareAlike Creative Commons
The program should let this LED blink.
Creating the Atmel Software Framework (ASF) Skeleton Project
We start the software development by creating a GCC C ASF Board Project Skeleton
in a new Adafruit_FeatherM0_ASF_Tutorials Solution for a User Board for the 01_Blink project.
See my Step-By-Step tutorial if you are not sure how to do this.
Adding the project specific Atmel Software Framework (ASF) code
The next step is to import the ASF modules needed for the specific project.
- Open the ASF wizard under
Project|ASF Wizard - Select Project
01_Blink
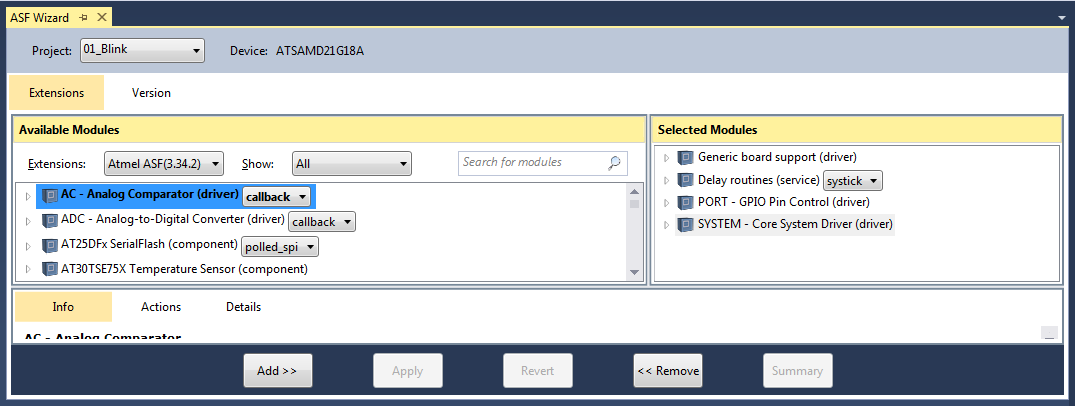
You should see two lists:
Available ModulesSelected Modules
In Selected Modules we already see:
Generic board support (driver)SYSTEM - Core System Driver (driver)
This is the standard framework needed for any ASF application.
For the LED to blink we need to control the PORT/Pin the LED is connected to.
But only switching on and off the LED pin in an endless loop, would make the LED blink so fast that we could not distinguish between the on and the off state. Therefore we want to delay the loop after each state change for 500ms.
So in Available Modules find:
Delay routines (service); systickPORT - GPIO Pin Control (driver)
Add>> those to the project.
Now press Apply. This will add all the necessary ASF code to our project.
Using the DIT Adafruit Feather Library
During the tutorials (and maybe later for "real" applications) there is some information that is needed by several applications and some tasks that are common to them.
To avoid having to reimplement or copy this code all the time, it is common practice to create library files and reference those whenever needed in a project.
I created a couple of library files for working with the Adafruit FeatherM0, while writing the tutorials.
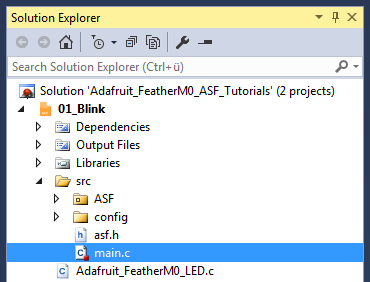
You can find these files in the root directory of the solution (.c and .h files starting with Adafruit_FeatherM0_*).
You need to:
- Add the
Adafruit_FeatherM0_LED.hfile path to the include search path of you project - Link the
Adafruit_FeatherM0_LED.cfile to the project
See my Step-By-Step tutorial if you are unsure how to do this.
Writing the application code
After all the preparation we finally now get to the point where we implement our application logic.
In the Solution Explorer find the generated main.c.
Here is the code that keeps the LED blinking.
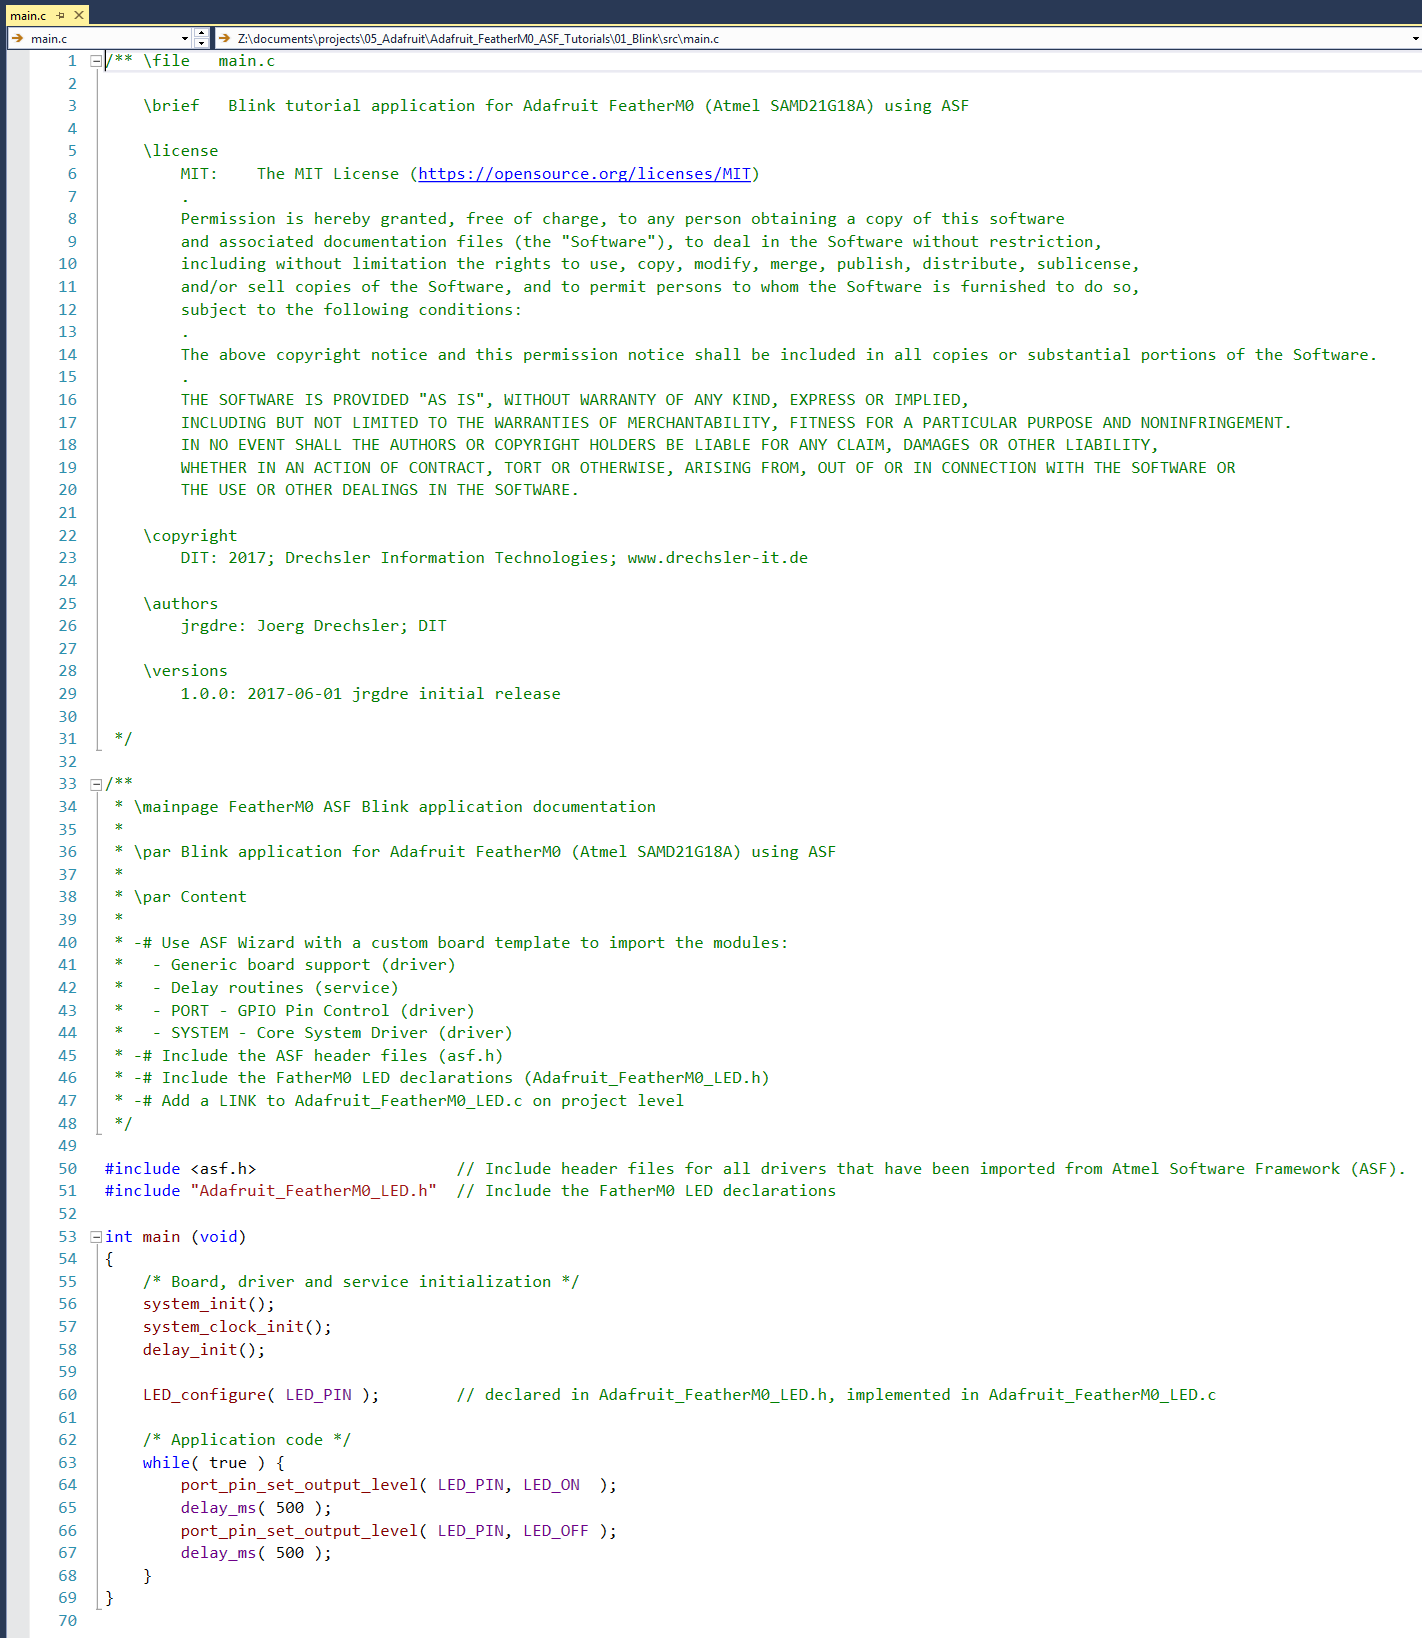
All we need to import to get the whole ASF magic working is the asf.h, that was generated by the ASF wizard.
The entry should already be there. The wizard took care of that for us.
In line 51 I include the Adafruit_FeatherM0_LED.h library header file.
This library provides us with:
- A couple of convenient name definitions, like:
so we don't have to look up the values all the time.LED_PINthe MCU pin the LED is connected to LED_ONthe signal level to write to the pin to turn the LED on LED_OFFthe signal level to write to the pin to switch the LED off - The
LED_configure()function, that configures the MCU pin, so it can drive the LED.
In the main() function (lines 37..53) we first initialize the ASF modules:
- Line 56 initializes the board
- Line 57 initializes the clock system
- Line 58 initializes the delay system
If you forget one of those there is a good chance the LED won't blink (might stays on or off all the time though - been there, done that ;-) )
- In line 60 we use our
LED_configure()function to set theLED_PINto output. - Now we enter a loop that never terminates (until you pull the plug on the MCU of course or reset it)
- In line 64 we set the level of the
LED_PINtoLED_ON - In line 50 we make the MCU wait for 500ms
- In line 66 we set the level of the
LED_PINtoLED_OFF - In line 67 we make the MCU wait for another 500ms
- now we return to line 63
- In line 64 we set the level of the